
Chapters
- Contents1
- Description and Specifications3
- Chapter 1 - Engine8
- Data8
- Accessory removal9
- Engine disassembly10
- Crankshaft and flywheel14
- Cylinder block16
- Pistons and connecting rods21
- Camshaft and valve mechanism26
- Cylinder head and front cover30
- Oil pump30
- Water pump32
- Governor34
- Oil pan, intake and exhaust manifolds38
- Assembly of engine40
- Installation of accessories46
- Definition of fits48
- Fits and tolerances50
- Torque wrench readings51
- Carburetor52
- Servicing the starter58
- Chapter 2 - Transmission61
- Chapter 3 - Power Take-Off71
- Chapter 4 - Belt Pulley75
- Chapter 5 - Rear Axle79
- Chapter 6 - Hydraulic System89
- Chapter 7 - Steering Gear101
- Chapter 8 - Service Bulletins111
- Bulletin Attachments126
Chapter 1 - Engine
Servicing the starter page 58
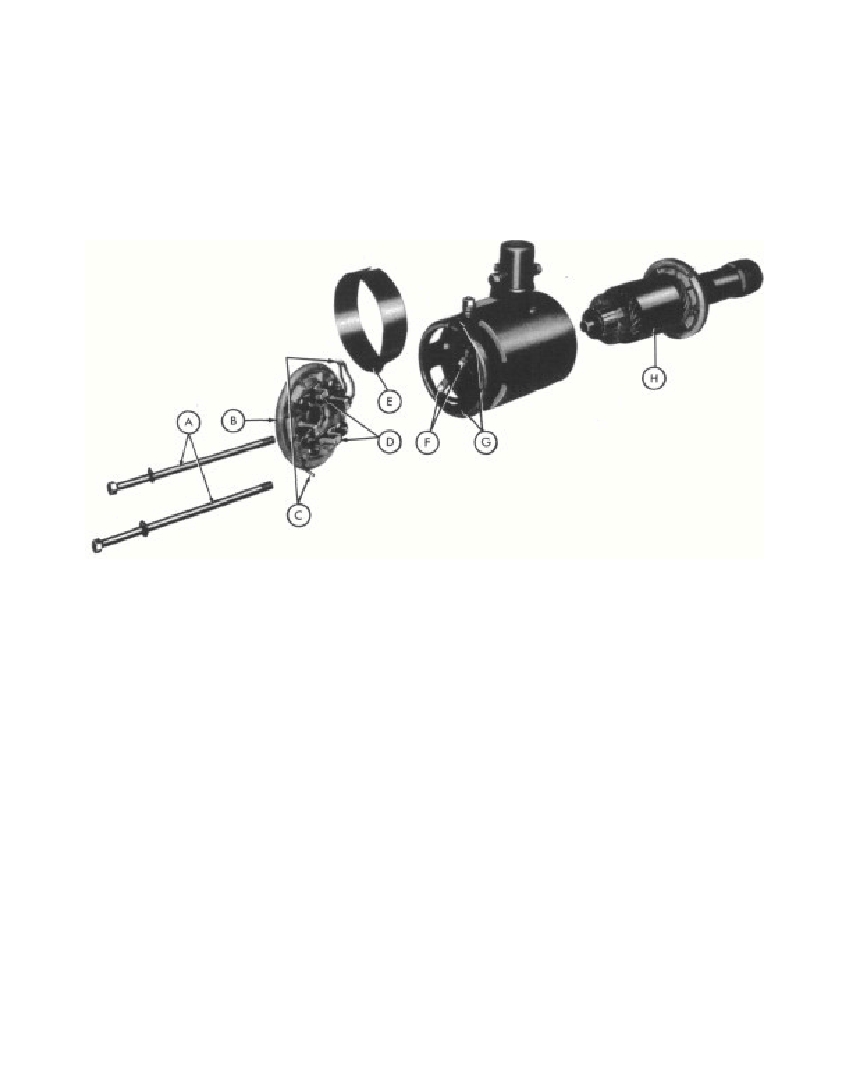 SERVICING THE STARTERFig. 1I. REMOVING THE STARTER FROM THE TRACTORStep 1—Disconnect the electrical leads to thestarter relay.Step 2—Loosen the two long bolts until the starterassembly is free from the engine housing.Step 3—Remove the starter assembly from thetractor.II. DISASSEMBLING THE STARTERStep 1—Remove the two long bolts (A-Figure 1).Step 2—Remove the armature and the bendixassembly (H-Figure 1) as a unit.Step 3—Remove the cover band (E-Figure 1)from the starter case.Step 4—Remove the brush end plate assembly(B-Figure 1).a. Remove the two insulated brushes(F-Figure 1) from the brackets (D-Fig-ure 1) in the brush end plate,b. Remove the two screws (G-Figure 1)that hold the ground brushes (C-Fig-ure 1) to the starter housing.III. CLEANING AND INSPECTING THE STARTERStep 1—Thoroughly clean the armature and com-mutator with a cloth and mineral spirits.NOTE: Avoid getting any mineral spirits on thearmature windings.Step 2—Check the armature windings for brokenor damaged leads.Step 3—Check the starter shaft bearings in thebrush assembly and rear starter plate andreplace if necessary.Step 4—Check the brushes and replace them ifthey are broken or worn.a. Remove the damaged brush from theleads.b. Solder new brushes to the leads.IV. ASSEMBLING THE STARTERStep 1—Position the brush plate assembly to line58
Free to read online. Contents · Where is the serial number on a 9N, 2N or 8N?