
Chapters
- Contents1
- Description and Specifications3
- Chapter 1 - Engine8
- Data8
- Accessory removal9
- Engine disassembly10
- Crankshaft and flywheel14
- Cylinder block16
- Pistons and connecting rods21
- Camshaft and valve mechanism26
- Cylinder head and front cover30
- Oil pump30
- Water pump32
- Governor34
- Oil pan, intake and exhaust manifolds38
- Assembly of engine40
- Installation of accessories46
- Definition of fits48
- Fits and tolerances50
- Torque wrench readings51
- Carburetor52
- Servicing the starter58
- Chapter 2 - Transmission61
- Chapter 3 - Power Take-Off71
- Chapter 4 - Belt Pulley75
- Chapter 5 - Rear Axle79
- Chapter 6 - Hydraulic System89
- Chapter 7 - Steering Gear101
- Chapter 8 - Service Bulletins111
- Bulletin Attachments126
Chapter 1 - Engine
Assembly of engine page 44
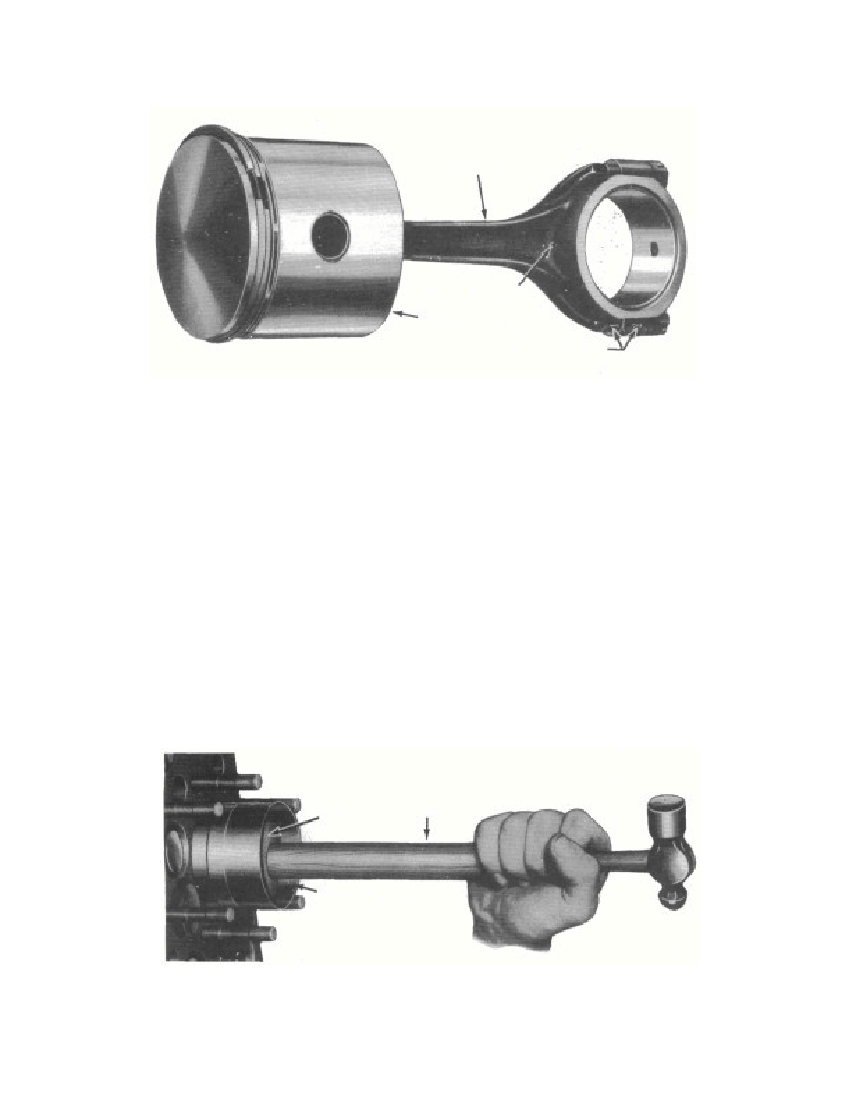 the piston rings. Place No. 1 connecting rod and piston assembly inthe No. 1 cylinder with the oil squirt hole in the connecting rodfacing toward the front of the engine (fig. 52). Install a piston ringcompressor on the piston rings, and tap the piston down into thecylinder with the handle end of a hammer (fig. 53). Place one-halfof the connecting rod insert bearing in the connecting rod and theother half in the connecting rod bearing cap. Coat the connectingrod insert bearings with a light film of oil. Carefully position theconnecting rod on the crankpin, and install the bearing cap on theconnecting rod, making sure the number on the bearing cap istoward the camshaft side of the engine. Make sure that the insertbearings are not jarred out of place. Install, but do not tighten, thenuts. Repeat the above procedure when installing the other con-necting rod and piston assemblies. Tighten all the connecting rodnuts from 35 to 40 pounds-feet, and install a cotter pin in each rodFig. 53—Installing Connecting Rod and Piston Assembly§ 131. f.3695-4744Fig. 52—Assembled Connecting Rod and Piston, Showing Oil Squirt HoleCONNECTING RODOIL SQUIRT HOLEPISTONCYLINDER NUMBERRM-588PISTONHammerPiston Ring CompressorRM-521
Free to read online. Contents · Where is the serial number on a 9N, 2N or 8N?